Are you tired of coming back from your travels with lackluster photos that don’t do justice to your amazing experiences? Look no further, because in this article, we’ll share 6 expert tips to help you capture the perfect travel photos. Say goodbye to blurry shots and choppy compositions, and say hello to stunning memories you’ll cherish forever. Let’s dive in!
Tip 1: Plan Ahead and Research Your Destination
When it comes to capturing the perfect travel photos, it is important to plan ahead and research your destination. Follow these steps to ensure you are well-prepared:
- Research the location’s landmarks, popular spots, and hidden gems.
- Check the weather forecast to choose the best time for photography.
- Learn about the local culture and customs to capture authentic moments.
- Research any photography restrictions or permit requirements at specific sites.
- Create a shot list to prioritize must-see locations and compositions.
- Plan your itinerary to maximize time at each location and ensure you do not miss any photo opportunities.
What Type of Shots Do You Want to Capture?
When embarking on travel photography, it is essential to consider the type of shots you want to capture. Whether you are interested in landscapes, architecture, street scenes, or portraits, having a clear vision will ensure you are well-prepared.
Researching your destination will help determine the iconic landmarks or hidden gems that are worth capturing. Understanding the local culture and customs will aid in capturing authentic moments. Additionally, considering the time of day and lighting conditions will help you create stunning compositions. By thinking ahead and identifying the shots you want to capture, you can make the most of your photography experience and tell a compelling visual story.
What Time of Day is Best for Photography?
The optimal time for photography is determined by the lighting conditions and the desired mood of the photograph.
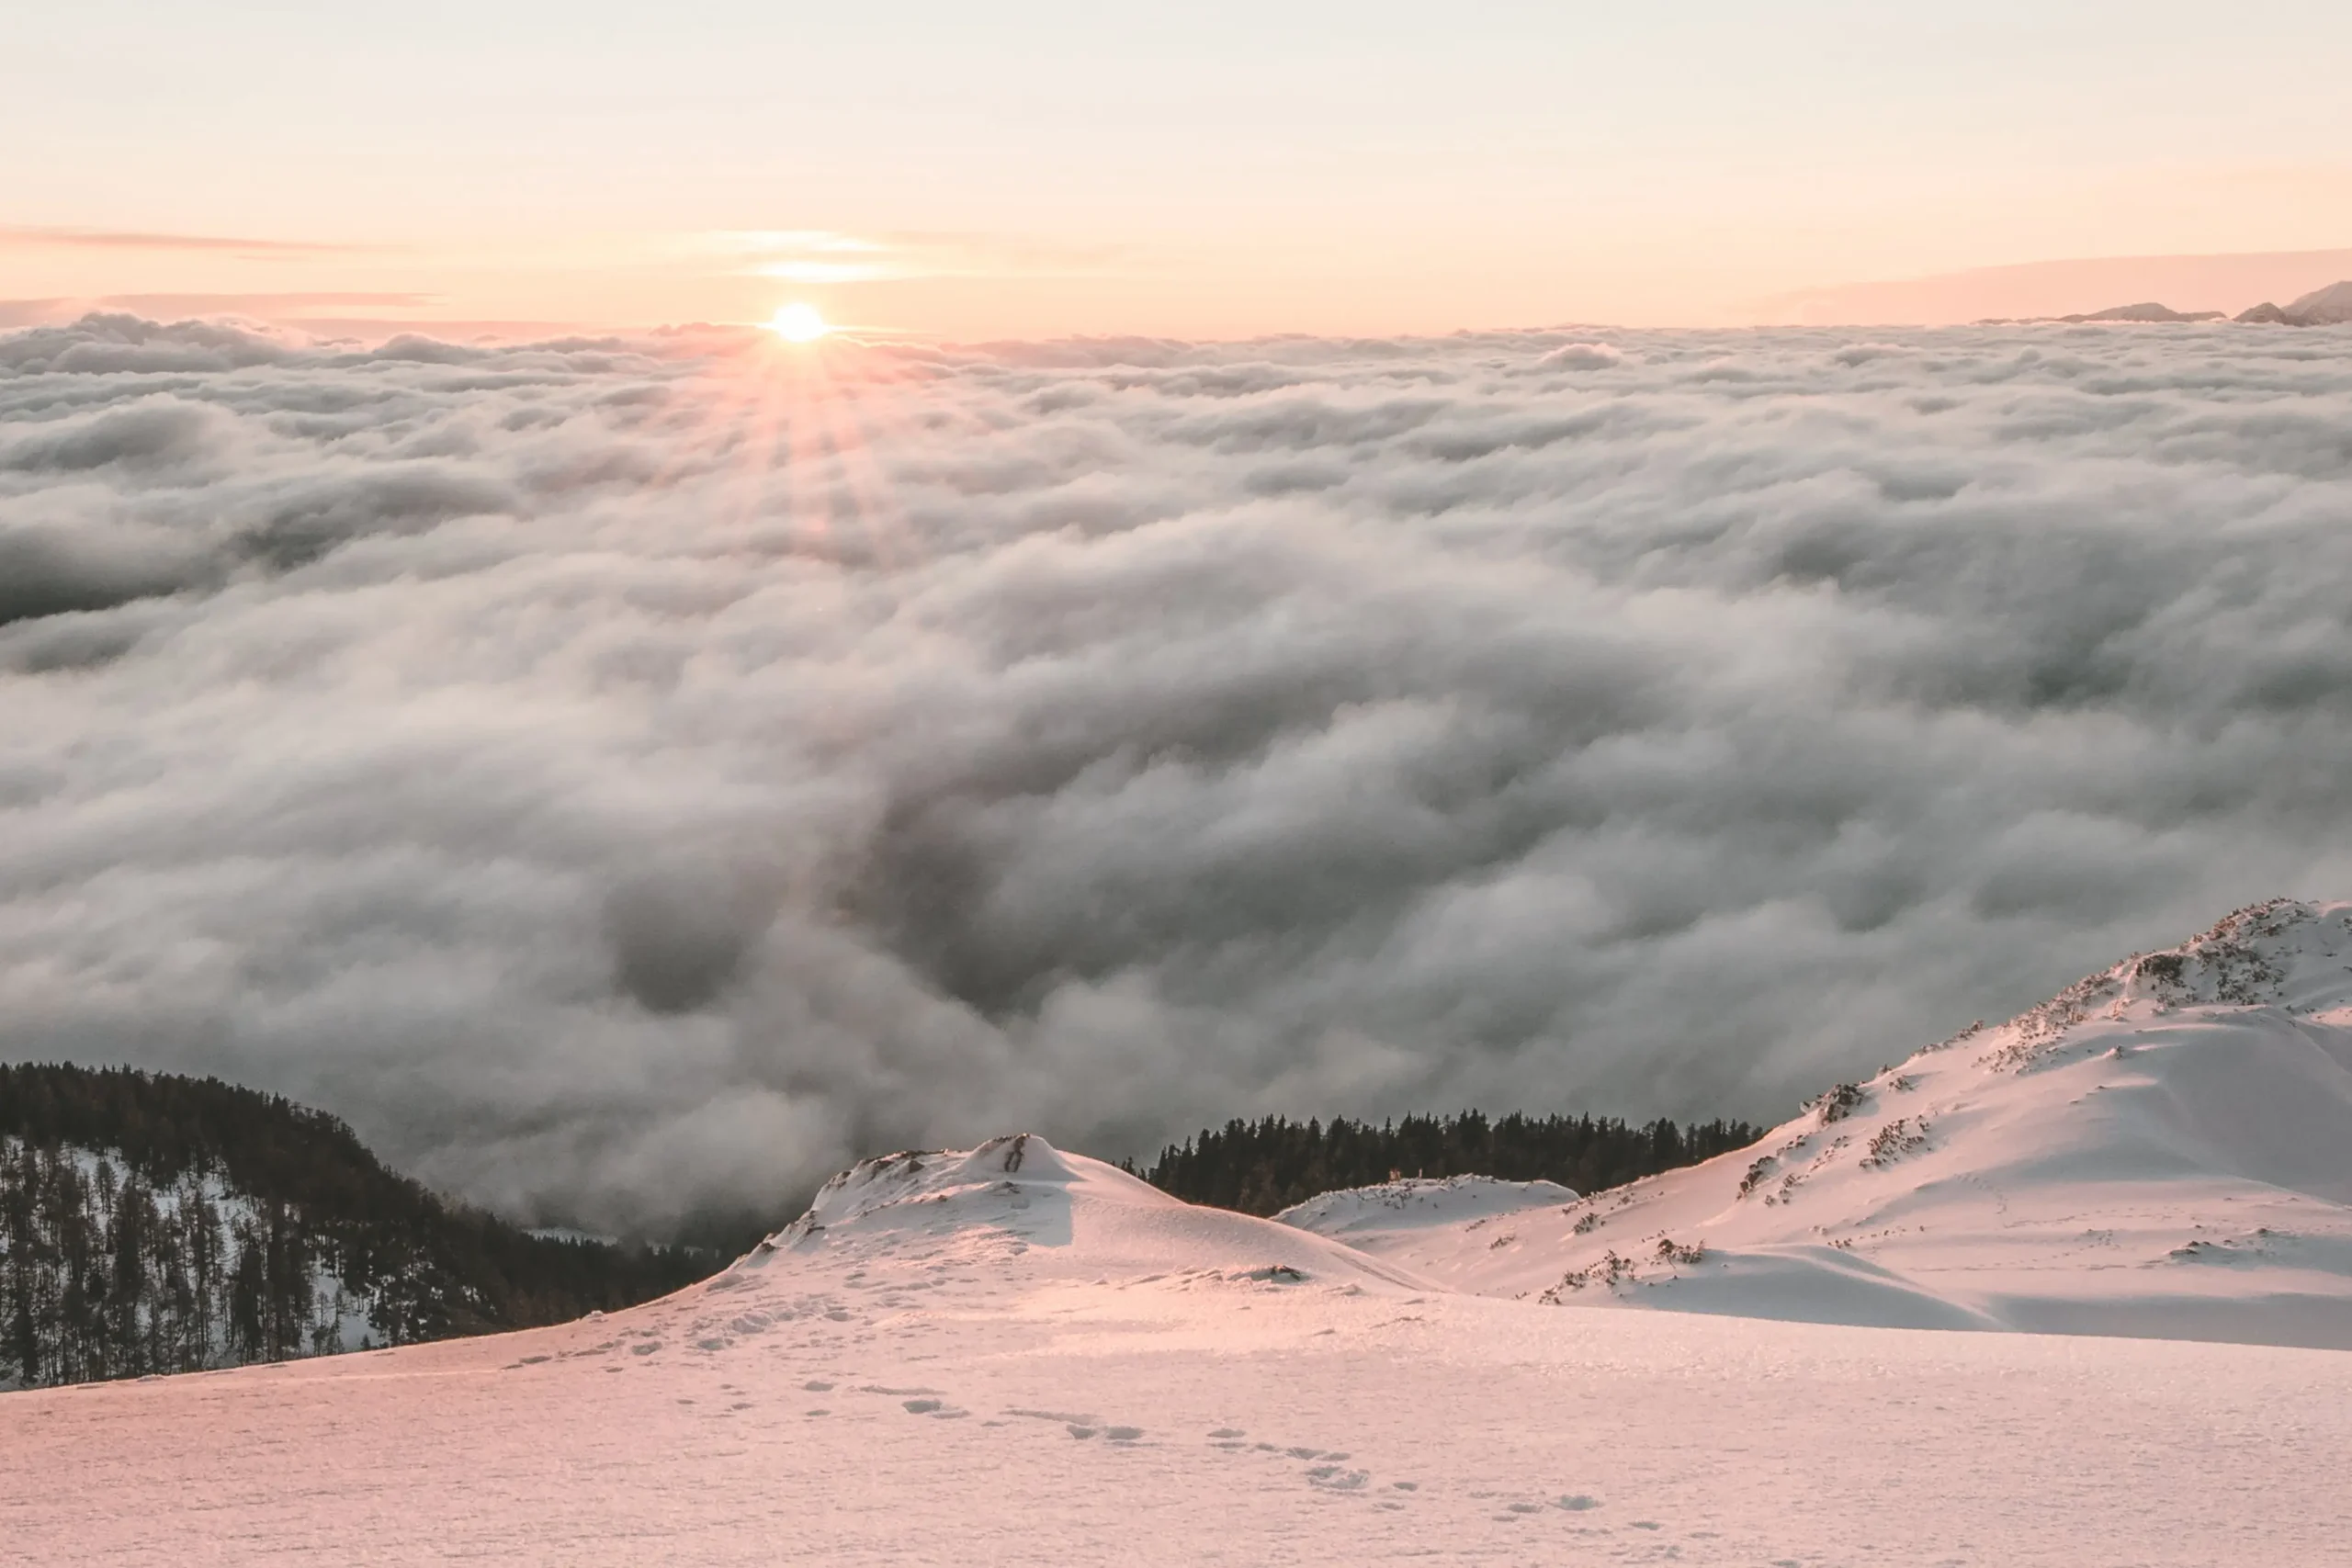
- Golden Hour: The hour after sunrise and before sunset offers warm, soft light and long shadows, creating a magical atmosphere.
- Blue Hour: The period before sunrise and after sunset when the sky turns deep blue can add a serene and peaceful feel to your images.
- Midday: While harsh sunlight can be challenging, it’s ideal for capturing vibrant colors and dramatic landscapes.
When deciding the best time to shoot, consider the subject and the effect you want to achieve. So, what time of day is best for photography? It ultimately depends on your creative vision and the story you want to tell through your images.
Are There Any Local Customs or Restrictions to Keep in Mind?
When taking travel photos, it is important to be mindful of any local customs or restrictions to ensure respectful and appropriate photography. Some destinations may have specific guidelines regarding photography in sacred or sensitive areas. It is crucial to research and understand these rules to avoid offending locals or violating cultural norms.
For example, in certain places, it may be considered disrespectful to take photographs of religious ceremonies or individuals without their permission. Always ask for consent when photographing people and respect their privacy. By adhering to local customs and restrictions, you can capture beautiful images while being a responsible traveler.
Pro-tip: Building relationships and engaging with locals can often lead to opportunities for capturing authentic and meaningful photographs.
Tip 2: Invest in Quality Camera Gear
Investing in quality camera gear is crucial for capturing the perfect travel photos.
- Research: Determine the camera and lenses that best suit your needs and budget.
- Camera body: Choose a camera with high resolution, good low-light performance, and fast autofocus.
- Lenses: Invest in versatile lenses like a wide-angle for landscapes and a zoom lens for capturing distant subjects.
- Accessories: Consider purchasing a sturdy tripod for stability and a polarizing filter for enhancing colors.
- Storage: Ensure you have enough memory cards and backup devices to store your photos safely.
Tip 2: Don’t underestimate the importance of investing in quality camera gear. It can significantly improve the overall quality and impact of your travel photos, so take the time to research and choose the right equipment for your needs and budget.
What Type of Camera is Best for Travel Photography?
When it comes to travel photography, the best camera for your needs and preferences depends on various factors. Mirrorless cameras are a popular choice due to their compact size and versatility, making them ideal for travel. Sony’s Alpha series and Fujifilm’s X series are known for their excellent image quality and wide range of lenses. For those who prefer DSLR cameras, Canon’s EOS and Nikon’s D series are reliable options. It’s important to consider factors like weight, image stabilization, and weather sealing when choosing a camera that can withstand different travel conditions. However, remember that the camera is just one aspect of a great photograph – your skills and creativity also play a significant role.
Pro-tip: Don’t forget to pack extra batteries and memory cards for longer trips.
What Lenses Should You Bring?
When it comes to travel photography, selecting the right lenses is essential for capturing the perfect shots. Take into account the following factors when deciding which lenses to bring:
- Versatility: Choose a versatile lens that can cover a wide range of focal lengths, such as a standard zoom lens or a wide-angle zoom lens.
- Specialization: If you have specific photography interests, like landscapes or wildlife, bring lenses that cater to those needs. For example, a telephoto lens for wildlife or a wide-angle lens for landscapes.
- Size and weight: Consider the size and weight of the lenses, as you will be carrying them during your travels. Opt for lightweight and compact options to minimize the burden.
Remember, the lenses you choose should align with your photography preferences and the types of shots you want to capture during your journey.
What Other Accessories Can Enhance Your Photos?
When it comes to improving your travel photography, there are numerous accessories that can elevate your images to the next level. Here are some options to consider:
- Tripod: A tripod provides stability and allows for long-exposure shots and sharp images, especially in low-light situations.
- External Flash: An external flash can add more light to your subjects, particularly in dimly lit environments or when shooting indoors.
- Filters: Filters such as polarizers or neutral density filters can enhance colors, reduce reflections, and control the amount of light entering the camera.
- Remote Shutter Release: This accessory enables you to capture photos without physically touching the camera, minimizing the risk of camera shake.
- Lens Cleaning Kit: Keeping your lenses clean is crucial for capturing clear and sharp images.
- Camera Bag: A well-designed camera bag offers convenient storage and protection for your equipment while on the go.
These accessories, in addition to your camera and lenses, can greatly enhance the quality and creativity of your travel photos.
Tip 3: Look for Unique Perspectives and Angles
In order to capture truly stunning and unique travel photos, it’s important to think outside the box and explore different perspectives and angles. In this section, we’ll discuss three key techniques for achieving this: experimenting with camera angles, utilizing reflections and shadows, and considering the use of a drone for aerial shots. By incorporating these tips into your photography, you can elevate your travel photos to a whole new level.
Experiment with Different Camera Angles
Trying out different camera angles can add a touch of creativity and visual interest to your travel photos.
- Capture subjects from a low angle to make them appear larger or more imposing.
- Consider shooting from a high angle to capture a unique perspective of the scene.
- Get down close to the ground for a worm-eye view, perfect for capturing architectural details.
Pro-tip: Don’t be afraid to push the boundaries and experiment with unconventional camera angles. Sometimes, the most captivating photos come from breaking the traditional rules of composition.
Use Reflections and Shadows to Your Advantage
Incorporating reflections and shadows into your travel photography can add depth, interest, and creativity to your shots. To maximize their potential, follow these steps:
- Look for reflective surfaces such as water, glass, or polished surfaces.
- Position yourself and your subject in a way that captures the reflection or shadow.
- Experiment with different angles and perspectives to find the most visually appealing composition.
- Take advantage of natural light to enhance the reflection or shadow.
- Use reflections or shadows to create symmetry or patterns in your composition.
- Consider using a polarizing filter to reduce glare and enhance the reflection.
Henri Cartier-Bresson, a renowned street photographer, was a master at utilizing reflections and shadows in his work. His iconic photograph, “Behind the Gare Saint-Lazare,” captured a man leaping over a puddle, creating a dynamic reflection that added an intriguing layer to the image. This photograph showcases the power of using reflections and shadows to create visually captivating and compelling photographs.
Consider Using a Drone for Aerial Shots
Adding a drone to your travel photography can provide a unique perspective. Keep the following factors in mind when deciding to use a drone:
- Regulations: Make sure to research and comply with local regulations regarding drone flying.
- Safety: Fly responsibly and prioritize the safety of others and the environment.
- Composition: Plan your shots carefully and utilize the drone to capture stunning aerial views that showcase the destination.
- Stability: Invest in a quality drone with reliable stabilization features to ensure smooth and steady footage.
- Practice: Familiarize yourself with drone controls and practice flying before your trip to capture the best aerial shots.
Tip 4: Pay Attention to Lighting and Composition
When it comes to taking stunning travel photos, lighting and composition are key elements that can make or break your shots. In this section, we’ll dive into the importance of paying attention to lighting and composition in order to capture the perfect travel photos. We’ll discuss how to utilize natural lighting to your advantage and how to compose your shots for maximum impact. With these expert tips, you’ll be able to elevate your photography skills and capture truly breathtaking travel moments.
How to Use Natural Lighting to Your Advantage
Using natural lighting effectively in travel photography can greatly enhance the quality of your photos. Here are some steps to help you use natural lighting to your advantage:
- Observe the direction of light: Pay attention to the position of the sun and how it creates shadows and highlights.
- Golden hours: Shoot during the early morning or late afternoon when the sunlight is softer and warmer.
- Diffused light: Seek areas with diffused light, such as shaded spots or cloudy days, for even lighting and reduced harsh shadows.
- Backlighting: Experiment with backlighting to create a beautiful halo effect and add depth to your subjects.
- Silhouettes: Use natural lighting to capture stunning silhouettes, positioning your subject against a bright background.
- Reflectors and diffusers: Utilize reflectors or white surfaces to bounce light onto your subject or use diffusers to soften harsh light.
By understanding and utilizing natural lighting, you can capture stunning travel photos that truly showcase the beauty of your destination.
How to Compose Your Shots for Maximum Impact
To capture the most impactful shots in travel photography, follow these steps:
- Consider the Rule of Thirds: Divide your frame into a 3×3 grid and strategically place your subject along the lines or at the intersections.
- Create Depth: Utilize leading lines, such as roads or fences, to draw the viewer into the scene and add depth to your composition.
- Find Balance: Ensure that elements in your frame are evenly distributed and balanced to create a visually pleasing composition.
- Include Foreground Interest: Incorporate elements in the foreground to add depth and create a sense of dimension in your photos.
- Play with Perspectives: Experiment with different angles and viewpoints to add visual interest and capture unique perspectives.
Tip 5: Capture the Local Culture and People
In this section, we will discuss the importance of capturing the local culture and people when taking travel photos. It goes beyond capturing beautiful landscapes and landmarks and instead focuses on the human element of a place. We will explore the best practices for respectfully photographing people and cultures, as well as techniques for capturing the essence of a place through its people. These tips will help you create meaningful and authentic travel photos that truly capture the spirit of a destination.
How to Respectfully Photograph People and Cultures
To respectfully photograph people and cultures while traveling, follow these steps:
- Ask for permission: Always seek consent before taking someone’s photo, especially in sensitive cultural or religious contexts.
- Learn local customs: Research and understand the cultural practices and traditions of the community you are photographing. Respect their values and avoid actions that may be offensive.
- Build a connection: Engage with the people you want to photograph. Establish a rapport and show interest in their lives and stories.
- Be mindful of privacy: Respect personal boundaries and avoid invading someone’s personal space. Avoid photographing vulnerable or intimate moments without explicit permission.
- Avoid stereotypes: Capture the diversity and richness of a culture without perpetuating stereotypes or exoticizing the subjects.
- Share the final images: If possible, share the photos with the people you have photographed. Offer to send them digital copies or prints as a token of appreciation.
How to Capture the Essence of a Place Through Its People
When capturing the essence of a place through its people in travel photography, follow these steps:
- Immerse yourself in the local culture: Learn about their customs, traditions, and way of life.
- Observe and connect: Spend time in local communities, interact with the people, and build rapport.
- Respectful approach: Seek permission before taking someone’s photo and be mindful of local customs and sensitivities.
- Show genuine interest: Engage in conversations, ask questions, and show curiosity about their lives and stories.
- Photograph daily life: Capture candid moments that reflect the daily routines, rituals, and activities of the locals.
- Portray emotions: Focus on capturing the genuine emotions and expressions of the people, conveying their joys, struggles, and aspirations.
- Tell their stories: Use your images to tell meaningful stories, highlighting the unique aspects of their lives and the essence of the place.
Tip 6: Edit Your Photos for the Perfect Finish
Editing your travel photos is crucial for achieving the perfect finish. Follow these steps to enhance your images and make them stand out:
- Choose the right editing software, such as Adobe Lightroom or Snapseed.
- Adjust the exposure, contrast, and saturation to achieve balanced lighting and vibrant colors.
- Crop and straighten your photos to improve composition.
- Remove any distractions or unwanted objects using the clone or healing brush tool.
- Apply selective edits to enhance specific areas of the image, such as boosting the colors of a sunset or sharpening details.
- Add the finishing touches by adjusting the white balance, applying filters, or adding a vignette.
True story: During a recent trip to Paris, I captured a stunning photo of the Eiffel Tower at sunset. However, in the original shot, there were distracting tourists in the foreground. By using editing software, I was able to remove them and create a more polished and focused image that perfectly captured the beauty of the landmark.
Tip 6: Edit Your Photos for the Perfect Finish
What Software and Apps are Best for Editing Travel Photos?
When it comes to editing travel photos, there are several software and apps that can help enhance your images. Some of the top choices include:
- Adobe Lightroom offers powerful editing tools and presets for quick adjustments.
- VSCO is another popular app known for its wide range of filters and editing capabilities.
- Snapseed is a versatile app that allows for precise adjustments and selective editing.
- For those seeking a more user-friendly interface, Canva and Pixlr are excellent options.
Ultimately, the most suitable software or app for editing travel photos will vary depending on your specific needs and preferences.
How to Enhance Your Photos Without Overdoing It
To improve your photos without going overboard, follow these steps:
- Adjust exposure and contrast: Find the right balance to bring out details without overexposing or losing important elements.
- Enhance colors selectively: Use tools like saturation or vibrance to boost colors in specific areas without making the entire image look artificial.
- Apply subtle sharpening: Enhance details without creating a harsh or unnatural look.
- Use targeted editing: Focus on specific areas or subjects that need improvements rather than applying heavy editing to the entire image.
- Keep it natural: Retain the authenticity and essence of the scene by avoiding excessive filters or effects.
Remember, the goal is to enhance your photos while maintaining their natural beauty. Subtle adjustments can make a big difference.
Frequently Asked Questions
What are some expert tips for capturing the perfect travel photos?
1. Plan your shots beforehand to capture the best angles and lighting.
2. Take advantage of the golden hour, when the natural lighting is at its best.
3. Incorporate elements of the local culture and scenery into your photos.
4. Experiment with different perspectives and composition.
5. Use a tripod or stabilize your camera for sharp, clear shots.
6. Don’t be afraid to try new techniques and get creative with your shots.
How important is the quality of camera equipment when taking travel photos?
While having high-quality camera equipment can definitely enhance the overall quality of your photos, it is not a necessity. With proper techniques and composition, you can still capture amazing travel photos using just a smartphone or basic camera.
How can I make my photos stand out from others on social media?
1. Experiment with editing tools and filters to add a unique touch to your photos.
2. Incorporate elements of storytelling in your photos to make them more engaging.
3. Use hashtags and geotags to increase your reach and connect with other travelers.
4. Post a mix of both popular landmarks and hidden gems to showcase a variety of your travels.
5. Interact with other users and engage in online communities to gain more exposure for your photos.
What are some common mistakes to avoid when taking travel photos?
1. Over-editing your photos to the point where they no longer look natural.
2. Not paying attention to the background and unintentionally including distractions.
3. Not taking the time to properly frame and compose your shots.
4. Only focusing on popular tourist spots and missing out on unique, off-the-beaten-path locations. 5. Not respecting the local culture and customs when taking photos.
How can I improve my photography skills while traveling?
1. Practice, practice, practice! Take lots of photos and experiment with different techniques.
2. Read up on photography tips and techniques specific to travel photography.
3. Take a photography class or workshop during your travels.
4. Join online communities or attend meetups with other photographers to learn and share tips.
5. Don’t be afraid to ask locals for advice on the best spots to capture photos.

2 thoughts on “How to Capture the Perfect Travel Photos 6 Expert Tips”